L-MOUNT Forum

Register a free account now!

If you are registered, you get access to the members only section, can participate in the buy & sell second hand forum and last but not least you can reserve your preferred username before someone else takes it.

Lumix 18-40 Lens Corrections worse on than off??

Jan.Wedekind

LMF-Patron
Hi everyone

I need some help understanding ultra-wide angle distortion and lens correction. I recently got the 18-40 to pair with the S1Rii. Lots of fun, especially with hybrid zoom, since I feel less constrained than just having ultra-wide all the time, for which I don't have a good eye.

But when looking at JPGs SOOC, I am really confused about what I see. Some images just look way too distorted.

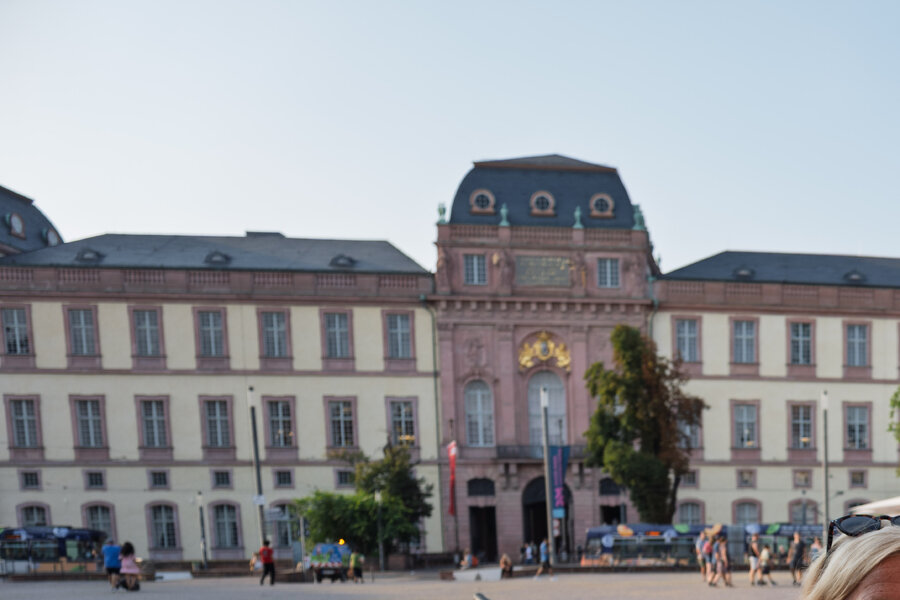
So below a top left corner crop from a photo. Exported from LR, one with lens Lens Corrections on, one off. Nevermind the photo, I otherwise don't have anything at hand that is sharp w/o family on it, but I think this suffices to make the point.

With correction ON:
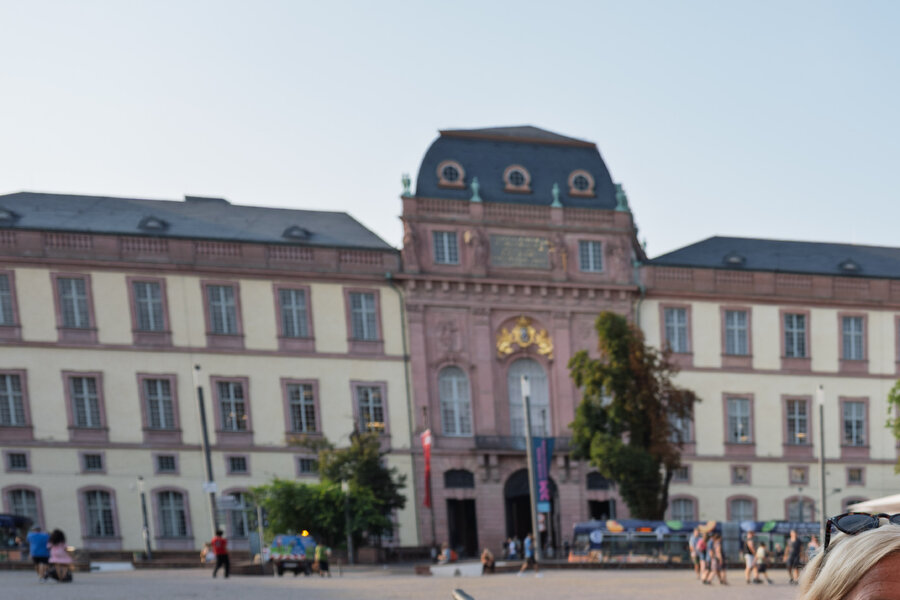
PS1R7498-corrected.jpg
  • Panasonic - DC-S1RM2
  • LUMIX S 18-40/F4.5-6.3
  • 19.0 mm
  • ƒ/4.6
  • 1/250 sec
  • Pattern
  • Auto exposure
  • ISO 80


Now with corrections OFF:PS1R7498-uncorrected.jpg
  • Panasonic - DC-S1RM2
  • LUMIX S 18-40/F4.5-6.3
  • 19.0 mm
  • ƒ/4.6
  • 1/250 sec
  • Pattern
  • Auto exposure
  • ISO 80


Now, both are obviously distorted. But I find the "corrected" one considerably worse.

Both is at 18mm, crop is from top left corner. The JPG SOOC looks pretty much identical to the LR corrected one (I assume LR uses Pansonic's lens profile)

So several questions:
  • Is this just normal at 18mm, mo matter the lens?
  • Does this "correction" look right to you?
Thanks for your help!
 
Yes, this is normal. Horizontal lines look more straight with correction on, but the correction it self costs a bit of the already low resolution due to the stretching needed. So you have to choose the trade-off you want to apply. Straightend lines vs resolution.
 
Is this just normal at 18mm, mo matter the lens?
I have the 18-40 and will take a look later in the week when I’m back home. And I’ll compare it to other ultra wide angles. I think this is normal, but I’m wondering if DxO does a better job. I have DxO Pure Raw as a plugin for Lightroom; it does its own lens corrections, and may handle this somewhat better.
 
I agree the uncorrected looks better, Jan. For example the width of the ground floor windows on the left hand side looks stretched in the corrected version.

I process with DxO PhotoLab and haven't noticed strange distortion with the 18-40mm.
 
I think what we are seeing here is the interplay of perspective distion and lens correction. Remember, "distortion correction" only fixes the barrel/pincushion distortion inherent in the lens. It does not fix perspective distortion, which comes from how the lens axis relates to the subject.

It looks to me like the lens axis isn't perpendicular to the front of the building, and thus the windows have differing amounts of skew from left to right (especially clear in the uncorrected version). With UWA, you need to do more than just have the lens level with the ground - you need to have the lens axis perpendicular in both directions to the front of the building if you want to avoid perspective distortion. This is true when you are photographing any flat object, like the front of a building or a painting hanging on the wall, with an UW lens.

Now when we add barrel (lens) correction on top of perspective distortion, things get weird, I agree. For example, look at the lady in the pink dress in the lower left; in the corrected version she looks, um, wider. This stretching interplays with perspective distortion in an unappealing fashion, for sure. At least in this image.

On the other hand, the uncorrected image looks like the building is sagging or frowning. Once you see that, you can't unsee it.

Anyway, that's why it's good to have a distortion correction slider in post; you can choose the "look" that best suits any given image.

Having said all that, it's possible there is a defect in LR, but I'm guessing not.
 
Thanks a lot everyone! My main issue is not so much buildings other straight lines. Basically any person that is slightly off centre becomes visibly and noticably "fatter" in the "corrected" image, i.e., stretched horizontally. This is obvious to anyone looking, not "pixel peeping".
 
The lens contains a profile to fix the optical design failures. That people look fatter off-centre, near the edges is normal at wide-angle. Actually people look thinner/normal in the centre.

The correction stretches even more to make it look optical correct.
 
Thanks a lot everyone! My main issue is not so much buildings other straight lines. Basically any person that is slightly off centre becomes visibly and noticably "fatter" in the "corrected" image, i.e., stretched horizontally. This is obvious to anyone looking, not "pixel peeping".
This is what happens when you combine an ultra-wide focal length with a rectilinear projection. The lens correction parameters are seeking to emulate a perfectly rectilinear lens, which will provide straight lines, but which will also distort the proportions of objects near the edge of the frame.

If you want an ultra-wide lens without any fattening of objects near the edge of the frame then use a fish-eye lens as a starting point. To get straight vertical lines de-fish the image using a generalized Panini projection. The result is an image where objects near the sides of the frame are not stretched, so a round ball will still look round, and a face will look like a normal face. Vertical lines will also be perfectly straight (if you pick the correct parameters). But nothing is perfect. Horizontal lines will not be straight, but will retain some curvature. Actually you can make the horizontal lines straight, but then the vertical lines will be curved, which is usually a bigger problem. If you want all of the lines to be straight then you need to apply a rectilinear projection, which inevitably distorts objects near the edge of the frame as you observed. In my opinion a rectilinear correction will often provide the worst results overall. In most cases a fish-eye image with a proper Panini projection will provide the most normal looking image, superior to a "well corrected" rectilinear lens. While I have only used this approach with a fish-eye lens there is no reason in principle while it wouldn't work with any non-fisheye lens that has a lot of barrel distortion (simply by using "milder" settings). I may play around with this.

By the way, to correct an image with a generalized Panini projection you can use the open-source Hugin panorama program. While it is primarily a panorama program, it does allow you to correct a single image using the Panini projection, or many other projections if you like to experiment.
 
Last edited:
This is what happens when you combine an ultra-wide focal length with a rectilinear projection. The lens correction parameters are seeking to emulate a perfectly rectilinear lens, which will provide straight lines, but which will also distort the proportions of objects near the edge of the frame.

If you want an ultra-wide lens without any fattening of objects near the edge of the frame then use a fish-eye lens as a starting point.
Or, use an anamorphic lens. But you have to like "cinematic-ish" aspect ratios.
To get straight vertical lines de-fish the image using a generalized Panini projection. The result is an image where objects near the sides of the frame are not stretched, so a round ball will still look round, and a face will look like a normal face. Vertical lines will also be perfectly straight (if you pick the correct parameters). But nothing is perfect. Horizontal lines will not be straight, but will retain some curvature. Actually you can make the horizontal lines straight, but then the vertical lines will be curved, which is usually a bigger problem. If you want all of the lines to be straight then you need to apply a rectilinear projection, which inevitably distorts objects near the edge of the frame as you observed. In my opinion a rectilinear correction will often provide the worst results overall. In most cases a fish-eye image with a proper Panini projection will provide the most normal looking image, superior to a "well corrected" rectilinear lens. While I have only used this approach with a fish-eye lens there is no reason in principle while it wouldn't work with any non-fisheye lens that has a lot of barrel distortion (simply by using "milder" settings). I may play around with this.

By the way, to correct an image with a generalized Panini projection you can use the open-source Hugin panorama program. While it is primarily a panorama program, it does allow you to correct a single image using the Panini projection, or many other projections if you like to experiment.
 
... To get straight vertical lines de-fish the image using a generalized Panini projection. The result is an image where objects near the sides of the frame are not stretched, so a round ball will still look round, and a face will look like a normal face. ...
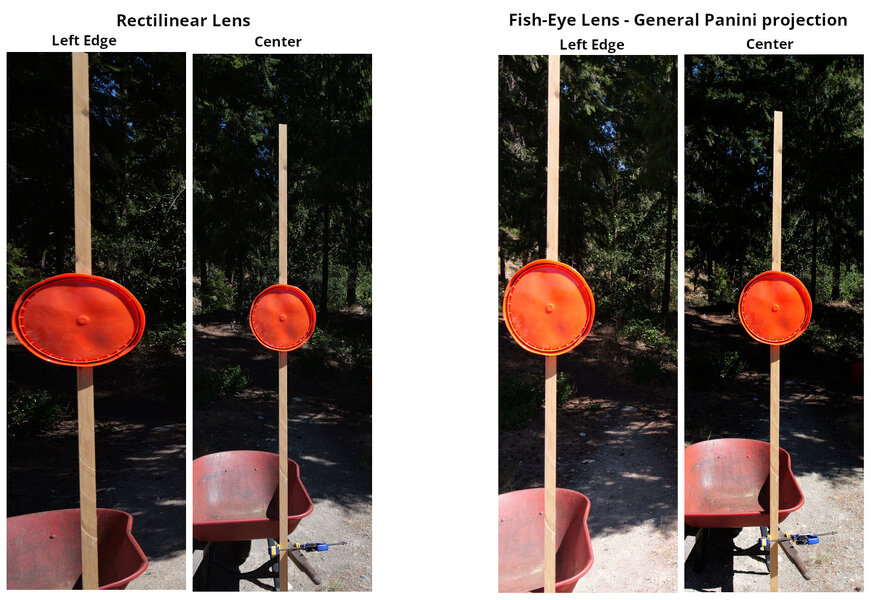
Here is a simple comparison. I couldn't find any human volunteers, so I had to emulate a face with a bucket lid. Maybe when recruiting a volunteer I shouldn't have led with "who wants to be photographed for a demonstration of how lenses can grossly distort your face".

Ultra-Wide-Comparison.JPG
I used two manual focus lenses with no built-in corrections, to keep the camera from altering the images. The rectilinear lens is the Pergear 14mm f/2.8 Mark II, which is known for having very little linear distortion. I have not applied any linear corrections to the images from this lens. The fish-eye lens is a Rokinon/Samyang 12mm f/2.8 Fish-Eye (stereographic). The uncorrected image has a crazy amount of linear distortion along the left edge, but the bucket lid ("Mr. Bucket Face") is round. Applying the correction straightens the vertical lines without turning Mr. Bucket Face into Mr. Fatty Face. This was done in Hugin, using a General Panini projection. In some cases there is a very small amount of residual barrel distortion, which can be corrected with no real adverse effects.
 
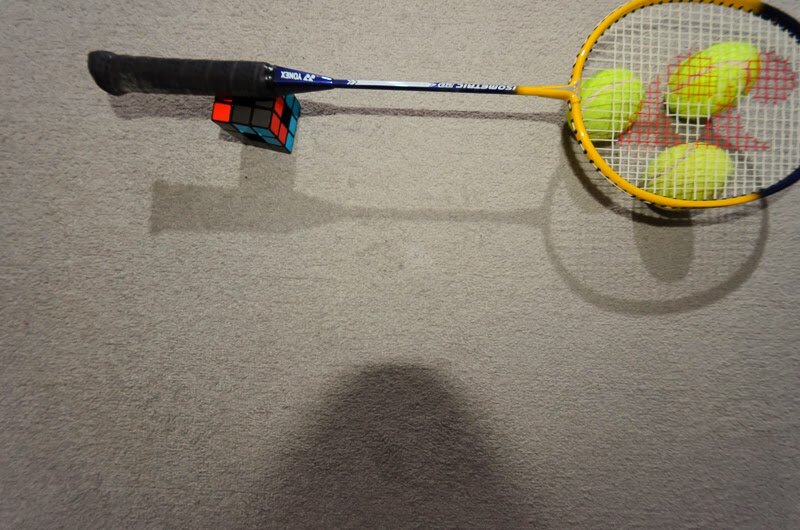
The effect of "stretched" corners when using super wide-angle lenses, for rectangular correction of lens distortion,
is different for 2D objects than for 3D objects. I wrote about it 20 years ago in a subject at "Dutch Nikon community".

Check the "unbelievably" effect what to see within the same image.

The normal "square" dimensions of the 2D stringing of a tennis racket.
Versus stretched 3D tennis balls.

Tennis-racket-bal.jpg


Extensive description by the Nikon community still online today.
Translated into English by Google Translate << HERE >>
-
 
Last edited:
For better understanding the effects of "strange" stretched image parts by super wide angle lenses.
Keep in mind the big differences to a given "point of view" of the photographer, versus magnification of the image,
and viewing distance of a given image.

For the "borders / sides" of a real photographic subject - the "point of view" is not perpendicular to these parts, but oblique.
By that you get all kinds of optical "image reductions".
If the print / copy of the photograph is "small" (e.g. 13x18 cm). And looking distance to that "same" picture at a relative bigger distance.
These "borders / sides" of the image as a point of view are much more perpendicular, so without optical "image reductions".
So another optical situation / "point of view" than reality.

If you "blow-up" the image / print to far bigger dimensions 40x60 cm ---- 2x3 meter
With a relative (very) short looking distance to that "same" picture.
The point of view to the "borders / sides" of that big image/print becomes far more oblique to.
In that case you get a much more realistic viewing experience without stretched image elements.

So much depends on adjusting the magnification (reduction) of an image/print in relation to viewing distance
as much as possible in the same proportions as viewing distance / point of view in "reality".

More backgrounds:

Check example of the interactive 360 degrees panorama image somewhere scrolling down at this website page:
Enlarge to full monitor size, and play by zooming in and out the viewed image.
When zoomed in, you don't encounter a "stretching" effect to the sides. By panning, still looking to all image areas.

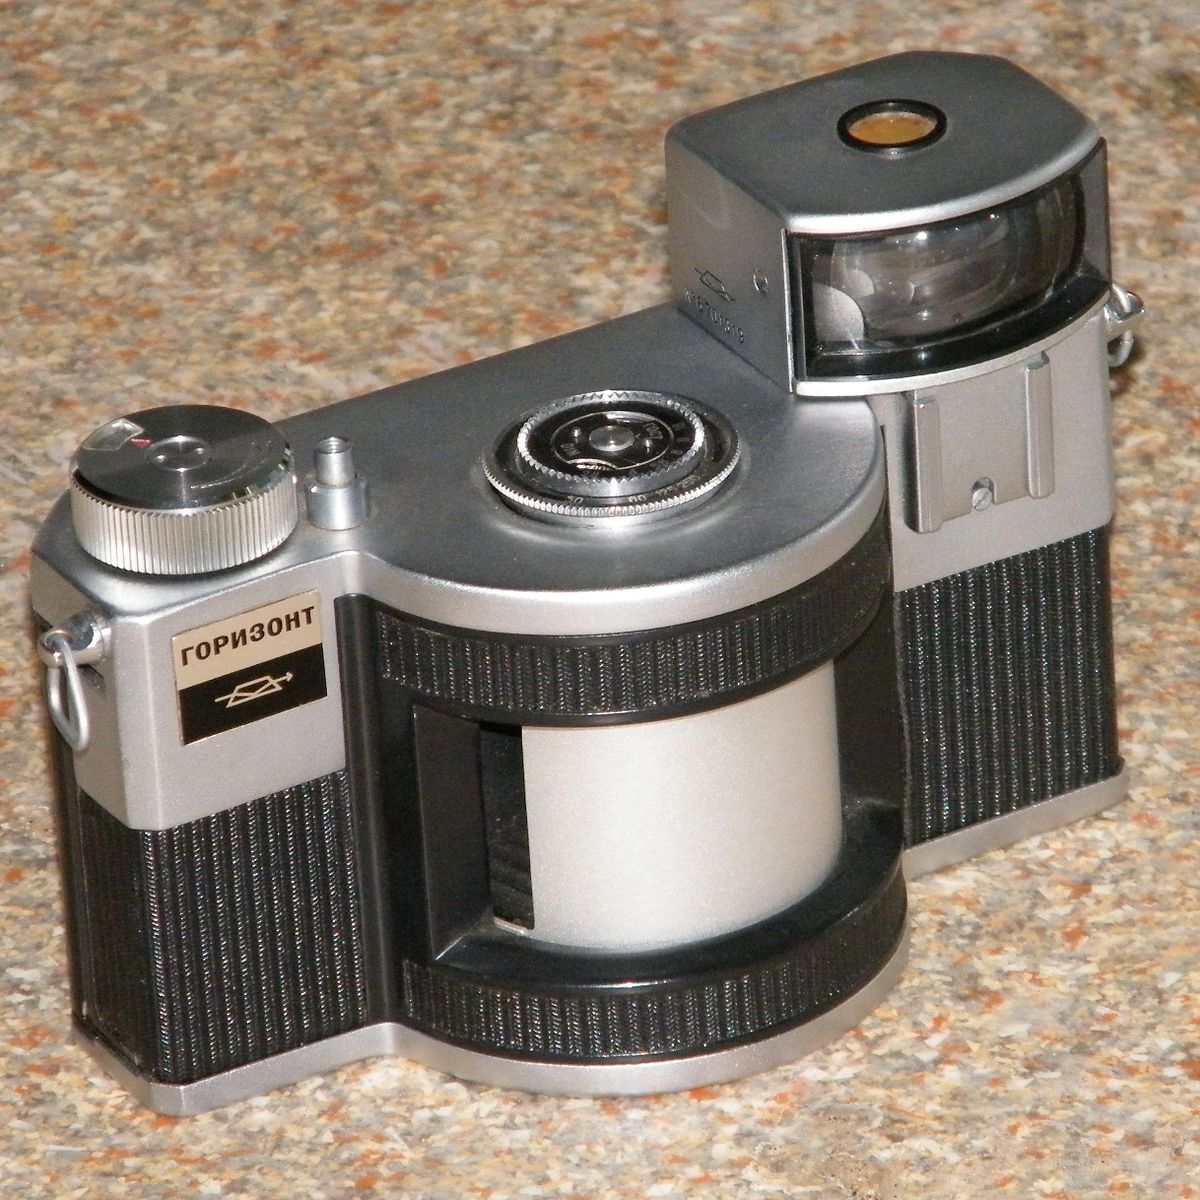
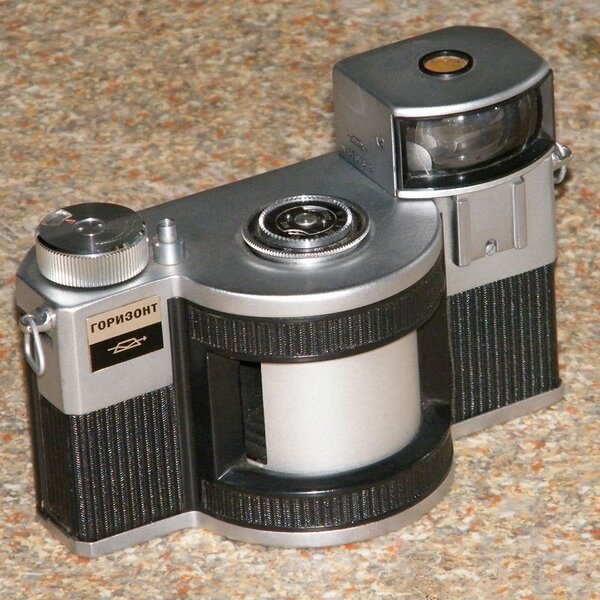
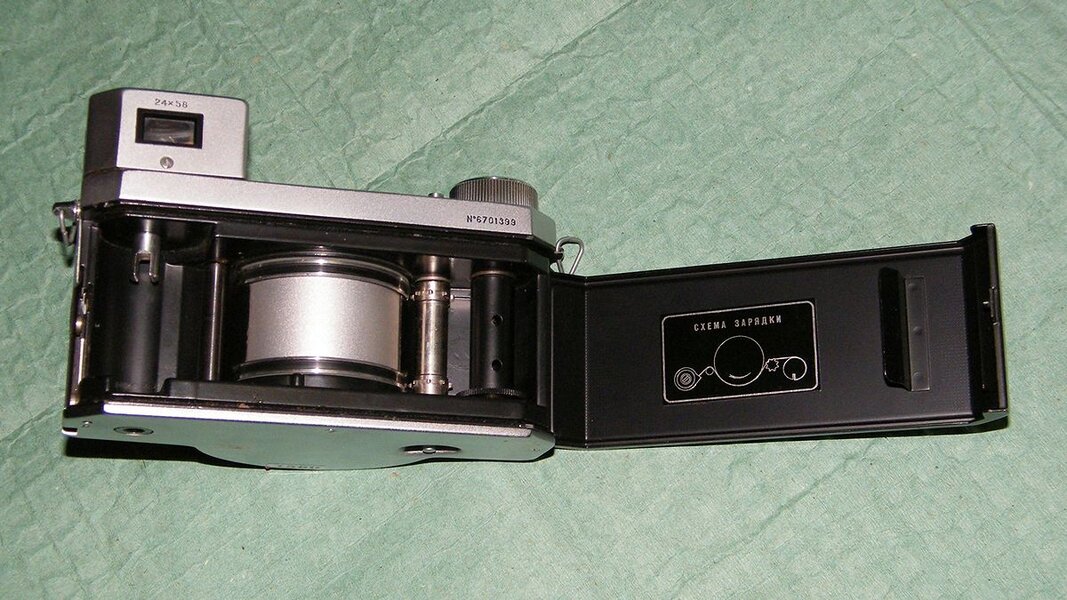
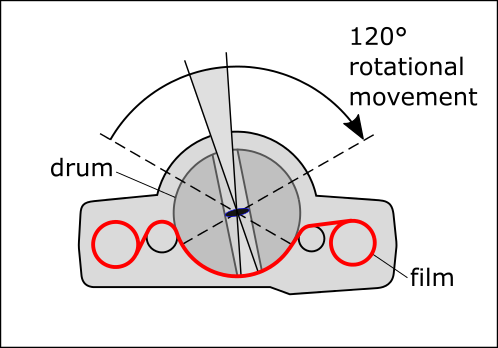
Another nice "panorama" method by old fashioned analogue film "half-round stretched" in a camera.
A lens rotated / moved around for the complete panorama during exposure.

Gorizont_Russian_camera_1967_800px.JPG
  • FUJIFILM - FinePix S2000HD S2100HD
  • 41.0 mm
  • ƒ/5.4
  • 1/420 sec
  • Pattern
  • Auto exposure
  • ISO 400


Горизонт_фотоаппарат_1-1200px.jpg
  • FUJIFILM - FinePix S2000HD S2100HD
  • 9.1 mm
  • ƒ/4
  • 1/125 sec
  • Pattern
  • Auto exposure
  • ISO 200


Horizon202sketch.png


In the past, (90 years ago ? --> at least when roll-film was invented),
similar group portraits of schoolchildren (of a complete school) were taken, using even older "rotating" panama cameras.
By placing the children in a semi-circular arrangement around the camera,
you created a "rectangular" sized panoramic image of the schoolchildren themselves.
However, the school building in the background would then be curved within the image.

Taking the entire photo from left to right of a rotating lens took a while (10-15 seconds?).
The trick for the outermost schoolboys was, once their part of the picture was taken / film was exposed,
to run very fast behind the camera and photographer to the other side of the half round arrangement,
before the rotating camera lens exposed that particular part of the film.
Then those 2-3 schoolboys did stand at the other side, and would be photographed "twice" within the same picture. :) Z04 Discosmilie
-
 
For better understanding the effects of "strange" stretched image parts by super wide angle lenses.
Keep in mind the big differences to a given "point of view" of the photographer, versus magnification of the image,
and viewing distance of a given image.
.....

Check example of the interactive 360 degrees panorama image somewhere scrolling down at this website page:
Enlarge to full monitor size, and play by zooming in and out the viewed image.
When zoomed in, you don't encounter a "stretching" effect to the sides. By panning, still looking to all image areas.

Another nice "panorama" method by old fashioned analogue film "half-round stretched" in a camera. ...

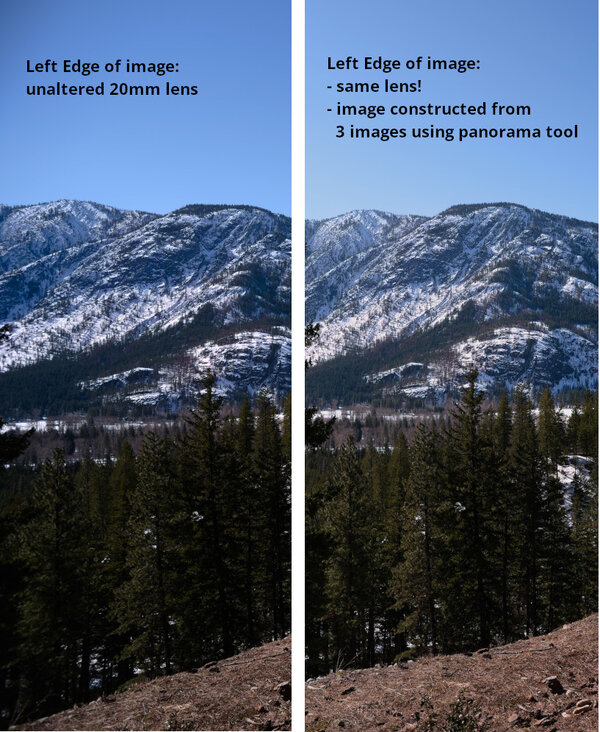
This is an interesting point. I have used this principle as yet another means to eliminate stretching near the edges of wide angle images. Here is a test I did, where I am comparing two approaches to getting a wide angle view of the same scene, using the same lens (a Pentax M 20mm f/4). The first slice is the left edge of the image using a simple shot, with no corrections or adjustments applied. The second slice shows the left edge of an image from a cropped panorama, constructed using images taken with the same lens. The simple 20mm image suffers from rather extreme stretching--that is not what this part of the scene looks like in real life! The cropped panorama provides a more natural image--without the horizontal stretching--even though I am using the same lens. It also provides a more accurate depiction of the foreground. Much of the foreground is stretched out of view in the corner of the simple image, but appears somewhat more natural in the panorama. The simple image also has more falloff, which is why it is darker (although I could easily correct this in post). Finally, when "pixel peeping" the full resolution image (not shown here), its clear that the panorama yields higher edge resolution, because the edges of the frame come from center slices of the images used to create the panorama.

Panorama-hack.jpg
 
Back
Top