Hello guys,
I finally decided to get some interest to the Real Time Lut function of the S5ii. I've seen a bunch of video explaining the benefits of it, and setting it up, but I still don't get how to set it up correctly. I don't get the difference between "My Photo Style" and "Real Time Lut".
So let me explain how I proceed so far.
1. LUT from Lumix LAB to Lumix S5ii
Let's say I want to use the Himalaya-N LUT in "Photo LUT":
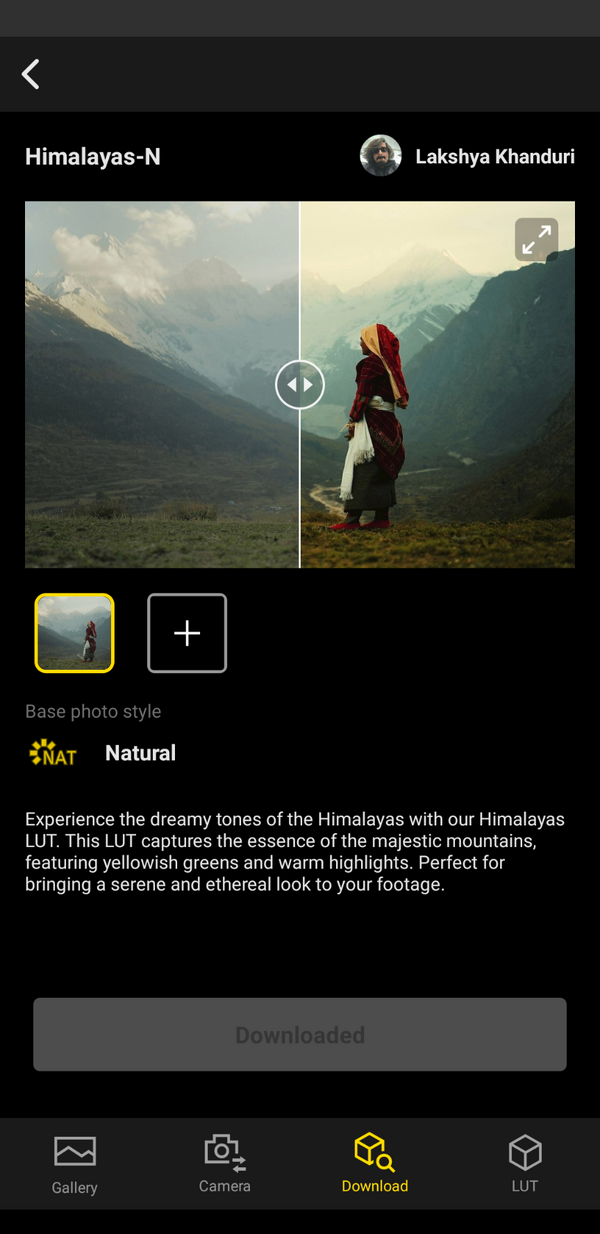
It says the Base photo style is from the Lumix profile "NAT". So If I take a photo fromthe camera, I should shoot with the "NAT" profile for the best result and after I can apply this LUT on Lumix LAB after transfering the photo. I got this part.
Now, if I want to bake it directly into the JPEG. I send the LUT to the S5ii, and I assign it. I renamed it by adding (photo) at the end, so I know it's for still photography.
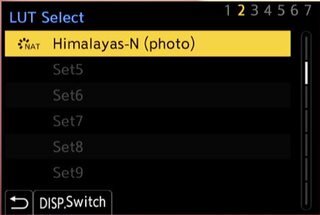
We can see there is still the little sign of "NAT" beside it.
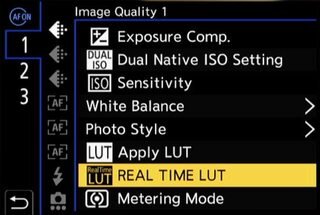
I also set the Real Time Lut function to the Af/On button:
2. How to correctly set it up
Here is the confusing thing. I find a few ways to take shoot with it and I don't know which one is the right one.
First one: through Real Time Lut Button
When I press the assigned button, It shows me the different LUT available and I can switch between them.
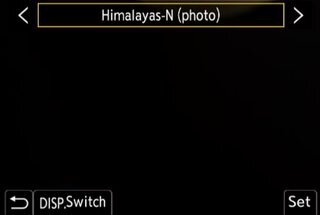
But I cannot change the strongness of the application (%, saturations, etc.). It also doesn't know if I shot from the "NAT" profile or not, EXCEPT if I go to the settings -> Image quality 1 -> Photo Style -> then into Real Time Lut, I see "NAT" is greyed out, and I can choose the Himalaya LUT or select another one. And change other settings.
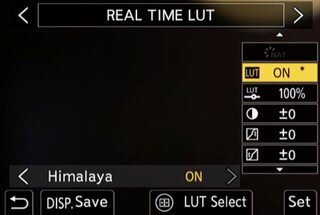
Second one: through My Photo Style
Through the same previous access (Settings -> Image Quality 1 -> Photo Style), I can also edit some Photo Style and choose the right default Color profile (NAT is not greyed out)
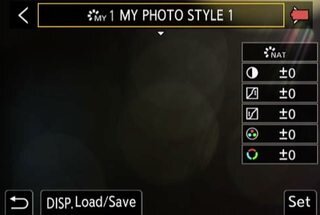
And further down, I can choose the LUT I want to apply (I can even choose two):
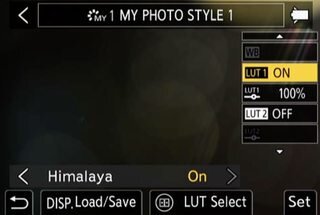
After doing a few test, I don't see any difference:

From Real Time Lut button with the Himalaya LUT already assigned.

From choosing a Photo Style and selecting Photo Style 1 where I assigned the "NAT" profile and the "Himalaya LUT".
So I'm completly lost here. What is the normal way to use it for photos? Do the LUT Himalaya already know it has to use the base "NAT" profile to be applied, so going through "My Photo Style" is kind of useless?
Thank you in advance for your inputs.
I intend to use Real Time Lut because I'll go to a wedding and the bride asked to take some pictures through the day because "I have a good camera". They already hired a photographer but he won't be here everytime. I absolutely don't want to spend weeks to post process as I'm not a pro, so I thought I would use a LUT for it and then done. Also, if somebody know a nice LUT for wedding (natural light, and another one for indoor light), feel free to suggest it here.
I finally decided to get some interest to the Real Time Lut function of the S5ii. I've seen a bunch of video explaining the benefits of it, and setting it up, but I still don't get how to set it up correctly. I don't get the difference between "My Photo Style" and "Real Time Lut".
So let me explain how I proceed so far.
1. LUT from Lumix LAB to Lumix S5ii
Let's say I want to use the Himalaya-N LUT in "Photo LUT":

It says the Base photo style is from the Lumix profile "NAT". So If I take a photo fromthe camera, I should shoot with the "NAT" profile for the best result and after I can apply this LUT on Lumix LAB after transfering the photo. I got this part.
Now, if I want to bake it directly into the JPEG. I send the LUT to the S5ii, and I assign it. I renamed it by adding (photo) at the end, so I know it's for still photography.

We can see there is still the little sign of "NAT" beside it.
I also set the Real Time Lut function to the Af/On button:

2. How to correctly set it up
Here is the confusing thing. I find a few ways to take shoot with it and I don't know which one is the right one.
First one: through Real Time Lut Button
When I press the assigned button, It shows me the different LUT available and I can switch between them.

But I cannot change the strongness of the application (%, saturations, etc.). It also doesn't know if I shot from the "NAT" profile or not, EXCEPT if I go to the settings -> Image quality 1 -> Photo Style -> then into Real Time Lut, I see "NAT" is greyed out, and I can choose the Himalaya LUT or select another one. And change other settings.

Second one: through My Photo Style
Through the same previous access (Settings -> Image Quality 1 -> Photo Style), I can also edit some Photo Style and choose the right default Color profile (NAT is not greyed out)

And further down, I can choose the LUT I want to apply (I can even choose two):

After doing a few test, I don't see any difference:

From Real Time Lut button with the Himalaya LUT already assigned.

From choosing a Photo Style and selecting Photo Style 1 where I assigned the "NAT" profile and the "Himalaya LUT".
So I'm completly lost here. What is the normal way to use it for photos? Do the LUT Himalaya already know it has to use the base "NAT" profile to be applied, so going through "My Photo Style" is kind of useless?
Thank you in advance for your inputs.
I intend to use Real Time Lut because I'll go to a wedding and the bride asked to take some pictures through the day because "I have a good camera". They already hired a photographer but he won't be here everytime. I absolutely don't want to spend weeks to post process as I'm not a pro, so I thought I would use a LUT for it and then done. Also, if somebody know a nice LUT for wedding (natural light, and another one for indoor light), feel free to suggest it here.
Last edited: